The Dynamic Form Engine allows you to define and manage forms dynamically without creating or modifying database tables.
Forms defined here can be used in the CMS and submitted through ready-made APIs, making it easy to collect, store, and manage user input without building custom backend logic.
This approach is especially useful for surveys, onboarding flows, applications, and any use case where form structure may change over time.
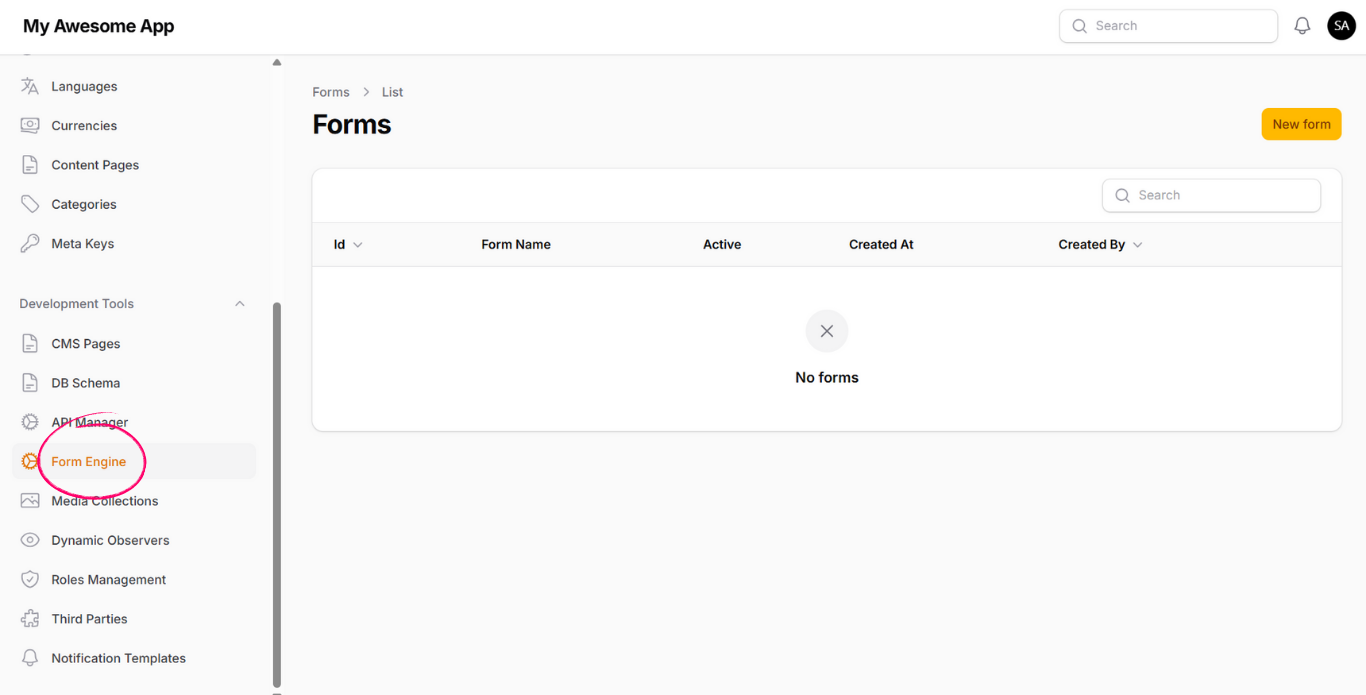
When you open the Dynamic Form Engine from the left-side navigation, you will see a page with a New Form button.
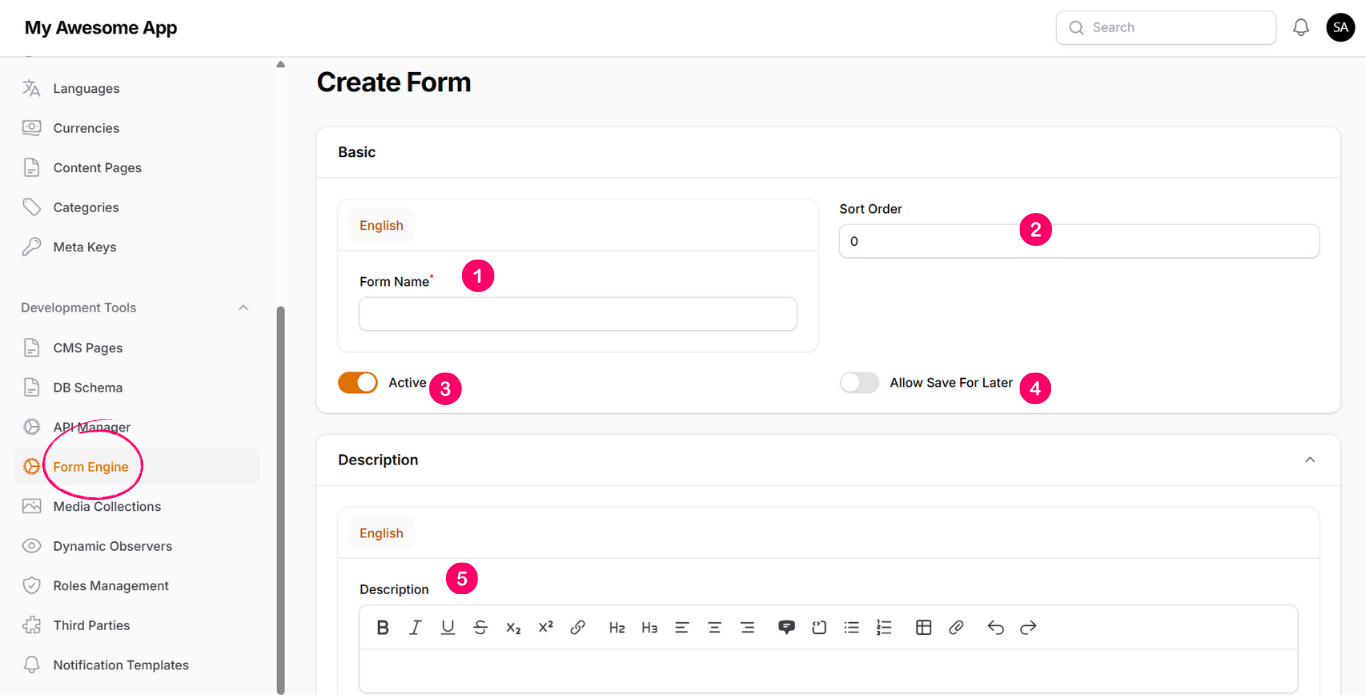
Click on New Form and fill in the following fields:
-
1. Form Name
The display name of the form. -
2. Sort Order
Controls the ordering of the form in the CMS. -
3. Active
When enabled, the form is available in the CMS and can be used by Form APIs. -
4. Allow Save For Later
Allows submitting the form without filling all required inputs, enabling users to complete it later. -
5. Description
A descriptive text for the form, which can be displayed above the form or elsewhere in your application.
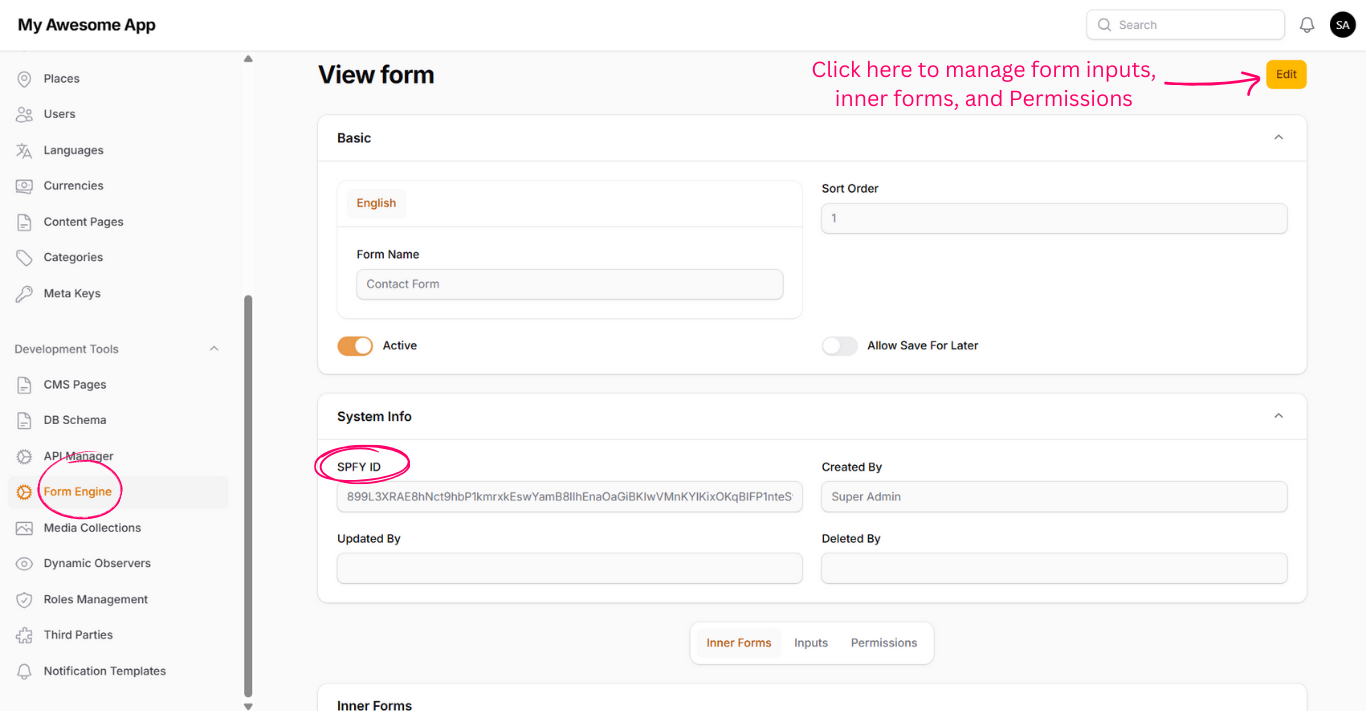
After saving the form, you will be redirected to the form view page.
This page displays the form details along with a unique System ID (spfy_id). This identifier is required when using Form APIs to retrieve or submit form data.
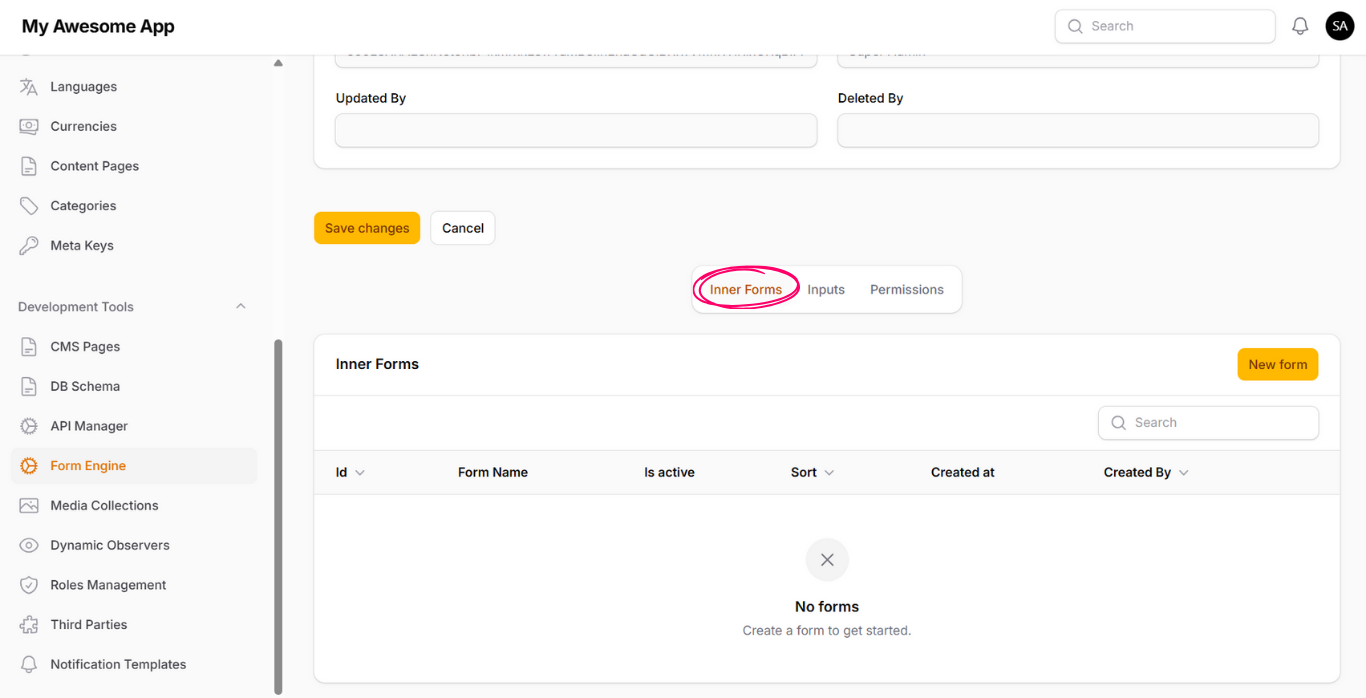
By clicking the Edit button, you can manage the form details and access the related configuration tabs.
Inputs define the fields that users will fill when submitting the form.
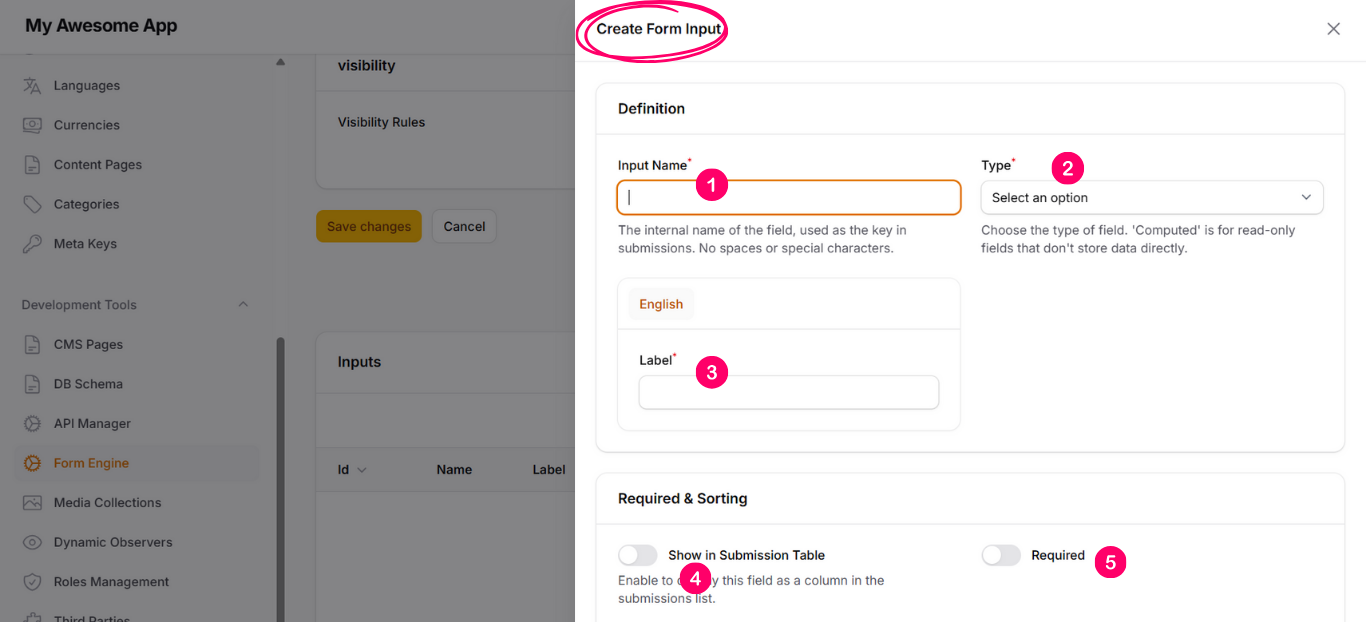
To add a new input, click on New Form Input and fill in the following:
-
1. Input Name
Identifier for the input. Must not contain white spaces or special characters. -
2. Type
Defines the input type such as string, text, select, etc. This helps frontend developers render the correct input. -
3. Label
Display name shown with the input. -
4. Show in Submission Table
When enabled, the input is displayed in the submissions list table. -
5. Required
Marks the input as required. -
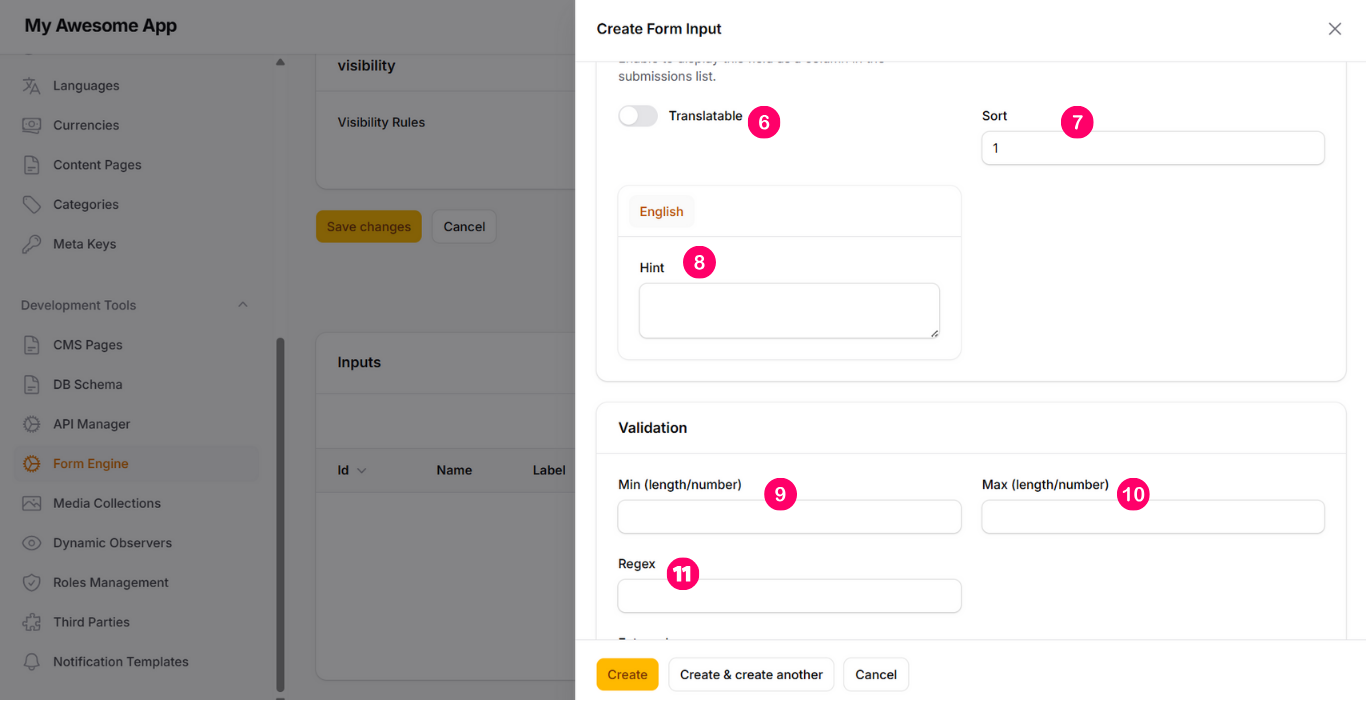
6. Translatable
Saves the input value as a language-based array. -
7. Sort
Controls the order of inputs within the form. -
8. Hint
Instruction or note shown under the input. -
9. Min (length / number)
Defines the minimum allowed length or numeric value. -
10. Max (length / number)
Defines the maximum allowed length or numeric value. -
11. Regex
Allows defining validation rules using regular expressions.

After adding inputs, they will appear in the inputs list for the form.
Permissions allow you to control access to the form and its inputs.
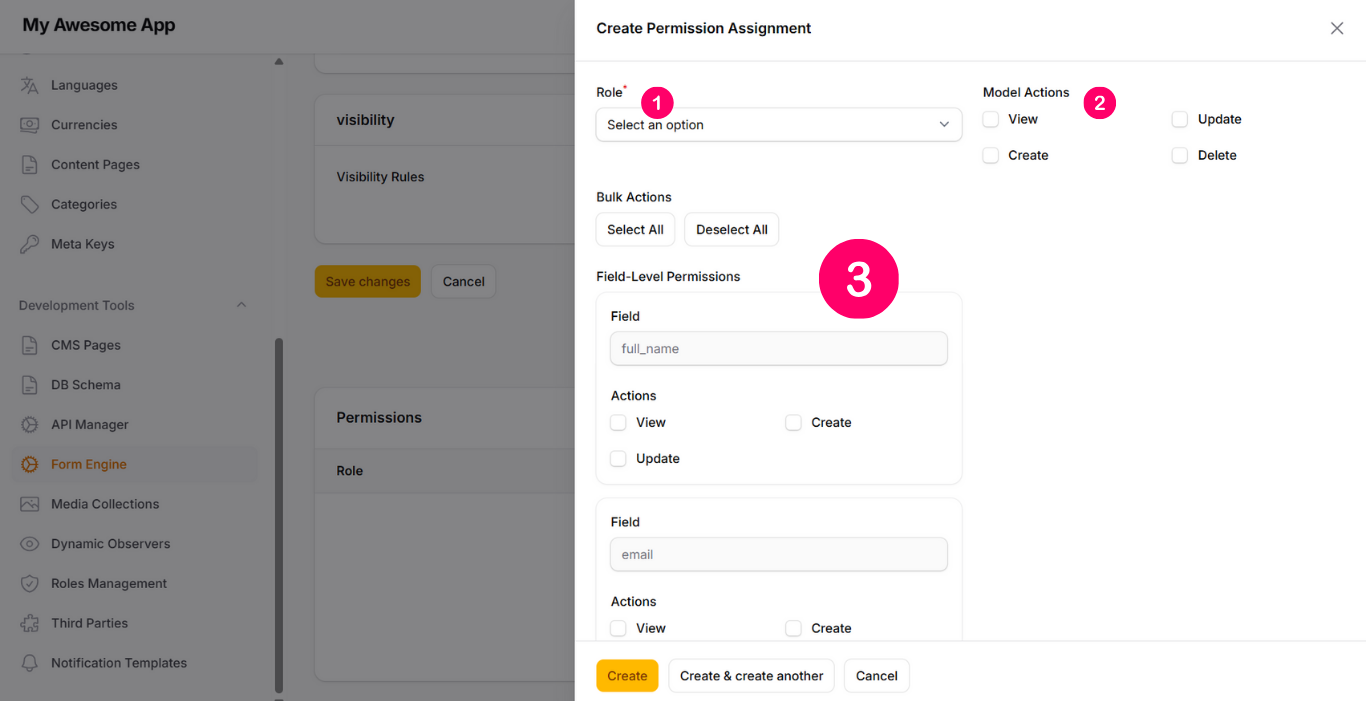
From the Permissions tab, click on New Permission Assignment and configure:
-
Role
Select the role to assign permissions to. -
Model Actions
Control access to view, create, update, and delete submissions. -
Field-Level Permissions
Control access to view, create, or update each input. Bulk actions are available for faster configuration.
When you click on a form name from the left-side navigation under the Forms group, you will see the submissions list for that form.
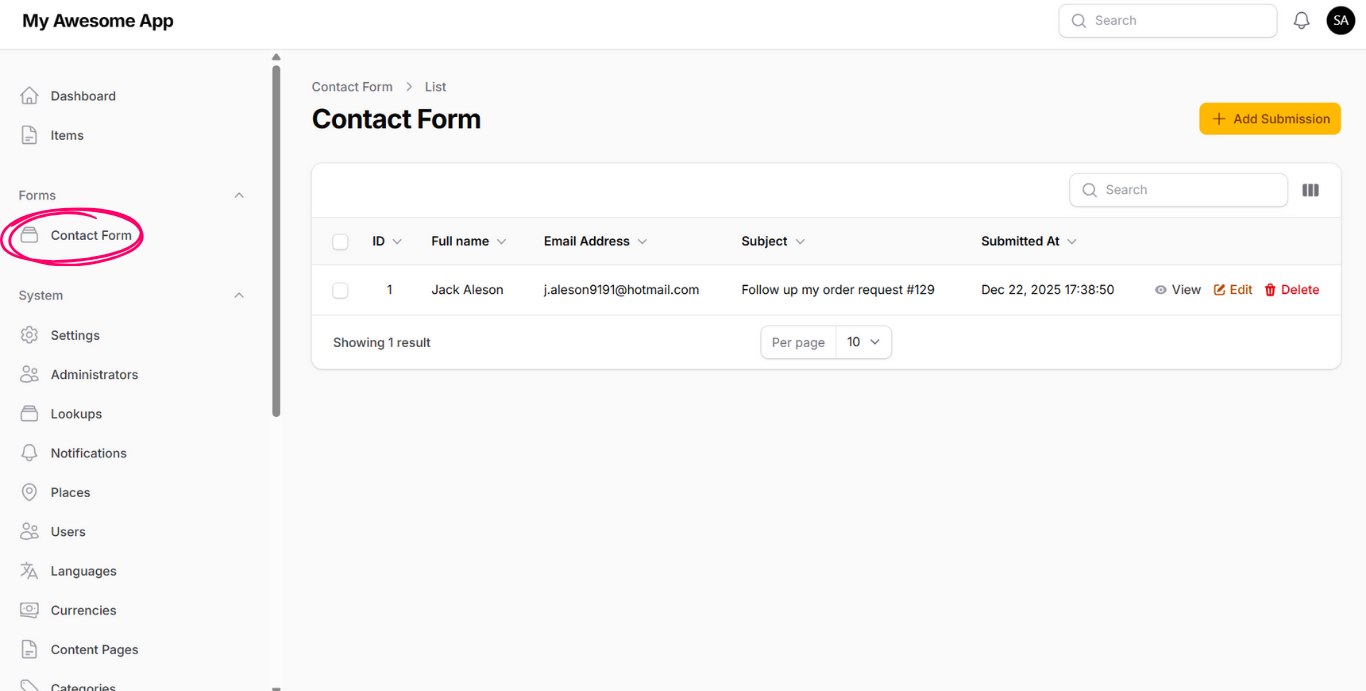
From this page, you can view and manage all submissions created through the CMS or submitted via Form APIs.
The submissions list supports searching by keyword and hiding or showing columns using the Show / Hide Columns option.